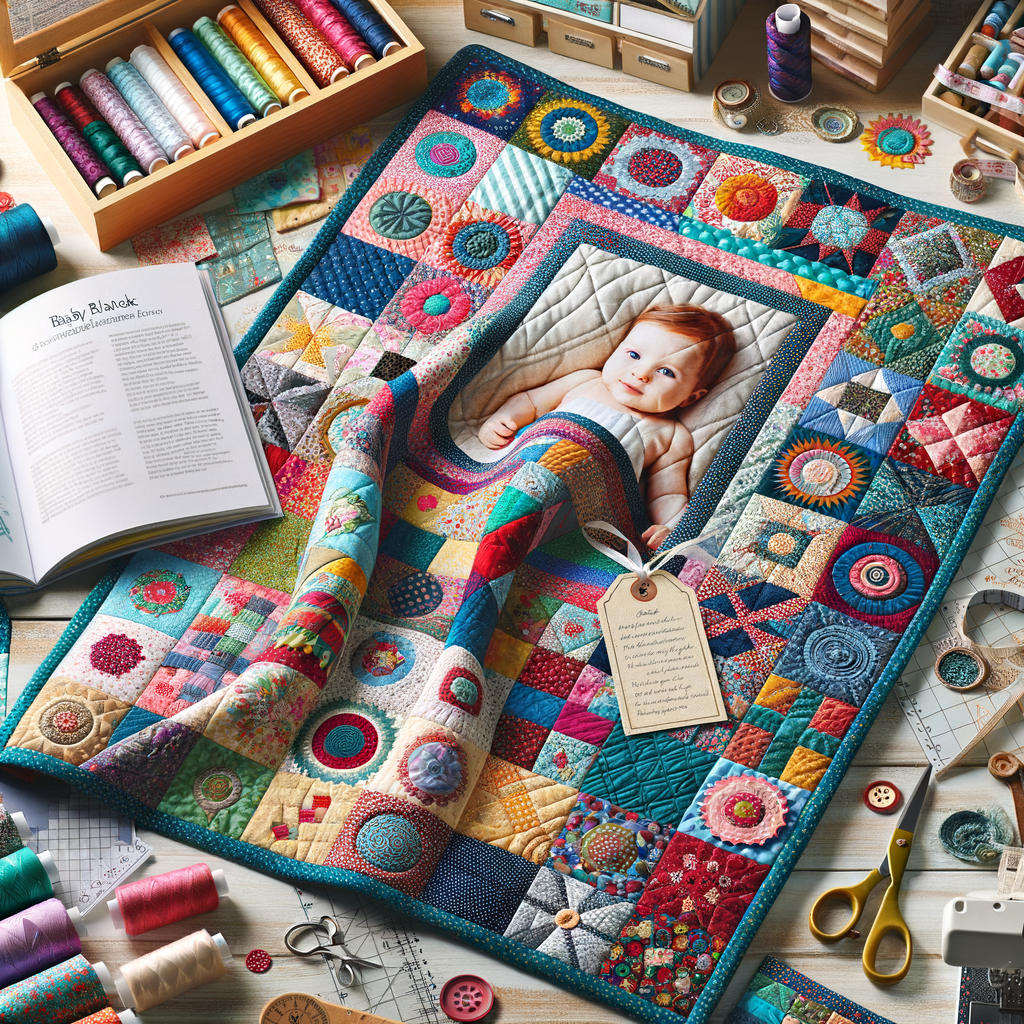
Introduction to Patchwork Baby Blankets
There’s something incredibly special about a patchwork baby blanket. It’s not just a piece of fabric. It’s a labor of love, a work of art, and a treasured keepsake that can be passed down through generations. In this blog post, we will explore the reasons why a patchwork baby blanket makes a perfect heirloom and the beauty of a handmade baby blanket.
- Why a Patchwork Baby Blanket is a Perfect Heirloom
- The Beauty of a Handmade Baby Blanket
A patchwork baby blanket is more than just a cozy cover for a little one. It’s a tangible piece of history, a symbol of love and care that can be handed down from one generation to the next. Each square of fabric tells a story, whether it’s a piece from a beloved old dress, a scrap from a grandparent’s shirt, or a swatch from a sibling’s first blanket. This unique blend of fabrics creates a one-of-a-kind pattern that can’t be replicated, making each patchwork baby blanket a unique heirloom.
Handmade baby blankets are truly special. They are crafted with love and care, each stitch a testament to the time and effort put into creating something beautiful and comforting for a baby. Unlike mass-produced blankets, a handmade blanket carries a personal touch, making it not just a blanket, but a cherished keepsake. The beauty of a handmade baby blanket lies not just in its aesthetic appeal, but also in the love and warmth it represents.
In the following sections, we will guide you through the process of creating your own patchwork baby blanket, including a step-by-step tutorial, popular patterns, and tips on how to personalize your blanket. We will also discuss how to make your patchwork baby blanket into a cherished heirloom gift. So, whether you’re a seasoned quilter or a beginner looking to take on a meaningful project, stay tuned for a journey of creativity and love.
Getting Started on Your DIY Baby Blanket
Creating your own patchwork baby blanket is a rewarding project that results in a beautiful and meaningful gift. This guide will help you get started on your DIY baby blanket journey. Let’s begin by understanding the materials you’ll need.
Materials Needed for a Patchwork Baby Blanket
Before you start sewing, it’s important to gather all the necessary materials. This will make the process smoother and more enjoyable. Here’s what you’ll need:
- Fabric Selection for a Colorful Heirloom
- Tools Required for Sewing a Baby Blanket
Choosing the right fabric is crucial for your patchwork baby blanket. You’ll need a variety of fabrics in different colors and patterns. Cotton is a popular choice because it’s soft, durable, and easy to work with. You can choose a color scheme based on the baby’s nursery or go for a rainbow of colors for a vibrant heirloom. Remember, this blanket is not just a practical item, but a keepsake that will be cherished for years to come.
Once you have your fabric, you’ll need some basic sewing tools. This includes a sewing machine, thread, scissors, pins, and a rotary cutter for cutting your fabric squares. You’ll also need a self-healing cutting mat and a clear acrylic ruler to ensure precise cuts. If you’re new to sewing, don’t worry. These tools are easy to use and will make your DIY project a breeze.
Now that you have your materials ready, you’re all set to start creating your DIY baby blanket. Remember, the process should be enjoyable, so take your time and have fun with it. Happy sewing!
Step-by-Step Patchwork Blanket Tutorial
Creating a patchwork blanket can be a fun and rewarding project. In this tutorial, we’ll guide you through the process step by step. Let’s start with the first step: preparing your fabric.
Preparing Your Fabric
Before you start sewing, it’s essential to prepare your fabric properly. This involves two main steps: washing and ironing, and cutting your fabric into squares.
- Washing and Ironing
- Cutting Your Fabric into Squares
It’s important to wash and iron your fabric before you start cutting. This is because fabric often shrinks slightly when it’s washed. If you cut your squares before washing the fabric, they might end up being different sizes after you wash the finished blanket. To avoid this, wash your fabric in warm water and dry it on a low heat setting. Then, iron it to remove any wrinkles. This will ensure that your squares are all the same size and your blanket lays flat when it’s finished.
Once your fabric is washed and ironed, it’s time to cut it into squares. The size of your squares will depend on how big you want your blanket to be. For a baby blanket, 4-inch squares are a good size. For a larger blanket, you might want to use 6-inch or 8-inch squares. Use a ruler and a rotary cutter to ensure your squares are all the same size. Remember to leave a 1/4-inch seam allowance on each side of the square for sewing.
Preparing your fabric correctly is the first step towards creating a beautiful patchwork blanket. In the next section, we’ll show you how to sew your patchwork squares together.
Sewing Your Patchwork Squares Together
Once you’ve prepared your fabric squares, the next step in creating your patchwork baby blanket is sewing them together. This process involves three main steps:
- Arranging Your Squares
- Sewing Your Squares into Rows
- Joining Your Rows to Form the Blanket
Before you start sewing, it’s important to arrange your squares in the pattern you want for your blanket. This is a crucial step as it determines the final look of your blanket. You can lay them out on a flat surface and move them around until you’re satisfied with the design. Remember, there’s no right or wrong way to arrange your squares – it’s all about personal preference and creativity.
Once you’ve decided on your arrangement, it’s time to start sewing. Begin by sewing your squares together into rows. Use a straight stitch on your sewing machine, and make sure to keep a consistent seam allowance. This will ensure that your rows line up correctly when you join them together. It’s a good idea to press your seams flat with an iron after each row is completed.
After all your rows are sewn, the next step is to join them together to form the blanket. Start by placing two rows right sides together and sewing along the long edge. Continue adding rows in this manner until all are attached. Remember to press your seams flat after each row is added. This will give your blanket a professional finish and make it easier to add the backing and binding in the final steps.
By following these steps, you’ll have a beautiful patchwork baby blanket that’s not only a cozy cover for a baby, but also a keepsake that can be cherished for years to come.
Finishing Your Patchwork Baby Blanket
Once you’ve sewn all your patchwork squares together, the next steps involve adding the backing and binding, and finally, quilting your blanket. These final steps will give your blanket a professional finish, making it a cherished keepsake for years to come.
-
Adding the Backing and Binding
The backing is the fabric that goes on the back of your blanket, while the binding is the fabric that wraps around the edges. To add the backing, cut a piece of fabric the same size as your blanket. Lay it right side down, then lay your blanket on top, right side up. Sew around the edges, leaving a small gap to turn the blanket right side out. Once turned, sew the gap closed.
For the binding, cut strips of fabric about 2.5 inches wide. Sew them together end-to-end to make one long strip. Fold the strip in half lengthwise and iron it flat. Sew it to the edge of your blanket, folding it over the edge and sewing it down on the other side to create a neat finish.
-
Quilting Your Blanket
Quilting is the process of sewing through all three layers of your blanket (the patchwork top, the batting in the middle, and the backing) to keep them together. You can quilt by hand or use a sewing machine. One popular method is to sew along the seams of your patchwork squares, creating a grid pattern. But you can also get creative and quilt in any design you like!
Remember, the more quilting you do, the more secure your blanket will be. But also, the more quilting, the less soft and flexible it will be. So find a balance that works for you.
And there you have it! Your patchwork baby blanket is now complete. With care and love, this blanket can become a cherished heirloom, passed down through generations. Happy quilting!
Popular Baby Blanket Patterns
When it comes to creating a patchwork baby blanket, the pattern you choose can add a unique touch. Here are some popular baby blanket patterns that are not only beautiful but also easy to create, even for beginners.
- Classic Checkerboard Pattern
- Diagonal Stripe Pattern
- Pinwheel Pattern
The Classic Checkerboard pattern is a timeless choice for a baby blanket. It involves alternating squares of two different fabrics to create a checkerboard effect. This pattern is simple to make, yet it results in a visually striking blanket. The Classic Checkerboard pattern is a great choice if you want to use two contrasting colors or fabric prints.
The Diagonal Stripe pattern is another popular choice. This pattern involves creating diagonal lines across the blanket by sewing strips of fabric together at an angle. The Diagonal Stripe pattern is a great way to showcase several different fabrics or colors. Plus, it’s a fun twist on the traditional striped blanket.
The Pinwheel pattern is a bit more complex, but it’s well worth the effort. This pattern involves sewing small triangles of fabric together to create a pinwheel effect. The Pinwheel pattern is a great choice if you want to create a blanket with a lot of visual interest and movement. It’s also a great way to use up small scraps of fabric.
Remember, the pattern you choose should reflect your personal style and the theme of the baby’s nursery. Don’t be afraid to experiment with different patterns and fabrics until you find the perfect combination. Happy sewing!
Creating a Personalized Baby Blanket
Creating a personalized baby blanket is a wonderful way to show love and care for the little one. Not only does it provide warmth, but it also becomes a cherished keepsake that can be passed down through generations. One of the best ways to personalize a baby blanket is by adding embroidery to it.
Adding Embroidery to Your Blanket
Embroidery can add a unique touch to your baby blanket. It allows you to incorporate designs that reflect the baby’s personality or commemorate a special event in their life. Here, we will discuss how to choose your embroidery design and some basic embroidery techniques for beginners.
- Choosing Your Embroidery Design
- Embroidery Techniques for Beginners
- Running Stitch: This is the most basic stitch in embroidery. It’s easy to learn and can be used to create simple designs.
- Back Stitch: This stitch is used to create solid lines and is perfect for outlining designs.
- Satin Stitch: This stitch is used to fill in designs, giving them a smooth and glossy finish.
Choosing the right embroidery design for your baby blanket is crucial. You might want to consider designs that are meaningful to you and the baby. This could be anything from the baby’s initials, birth date, or a simple but cute design like a teddy bear or a heart. Remember, the design should not be too complex, especially if you are a beginner.
If you are new to embroidery, don’t worry. Here are a few simple techniques to get you started:
Remember, practice makes perfect. Start with simple designs and as you gain confidence, you can move on to more complex ones.
In conclusion, adding embroidery to your baby blanket not only personalizes it but also adds a touch of charm and uniqueness. It’s a fun and rewarding process that allows you to create a special gift for your little one.
Making Your Patchwork Baby Blanket an Heirloom Baby Gift
Creating a patchwork baby blanket is not just about crafting a cozy cover for your little one. It’s about creating a piece of family history, a treasured heirloom that can be passed down through generations. Here are some tips on how to make your handmade baby blanket an heirloom gift.
- Preserving Your Handmade Baby Blanket
Your handmade baby blanket is a labor of love and deserves to be preserved with care. Here are some tips:
1. Wash Carefully: Always use a gentle cycle and mild detergent when washing your blanket. Avoid bleach as it can damage the fabric and colors.
2. Store Properly: When not in use, store your blanket in a cool, dry place. Avoid direct sunlight as it can fade the colors. A cotton bag is a good storage option as it allows the blanket to breathe.
3. Repair Promptly: If your blanket gets damaged, repair it promptly to prevent further deterioration. If you’re not sure how to do it, consider seeking professional help.
- Passing Down Your Colorful Heirloom
Passing down your patchwork baby blanket as an heirloom is a wonderful way to keep family traditions alive. Here’s how you can do it:
1. Document the History: Write a note about the blanket’s history – who made it, when, why, and for whom. This adds a personal touch and makes the gift even more special.
2. Teach the Next Generation: If possible, teach the next generation how to make their own patchwork baby blankets. This not only keeps the tradition alive but also creates a bonding experience.
3. Gift with Love: When the time comes, pass down the blanket with love and share the story behind it. This will make the recipient appreciate the gift even more.
In conclusion, a patchwork baby blanket is more than just a piece of fabric. It’s a symbol of love, care, and family tradition. By preserving it properly and passing it down with love, you can turn it into a cherished heirloom that will be treasured for generations to come.
Conclusion: The Joy of Creating a Quilted Baby Blanket
As we wrap up our journey into the world of patchwork baby blankets, it’s time to reflect on the process and the joy that comes from seeing your creation cherished. The experience of creating a quilted baby blanket is not just about the final product, but also the love, care, and creativity that goes into each stitch.
- Reflecting on the Process of Sewing a Baby Blanket
- Seeing Your Patchwork Baby Blanket Cherished
Looking back at the process of sewing your baby blanket, you’ll likely remember the hours spent selecting the perfect patterns, cutting the fabric, and carefully sewing each piece together. Perhaps you encountered challenges along the way, but with patience and perseverance, you overcame them. This process is a testament to your dedication and love. Each stitch is a symbol of your affection, making the blanket more than just a piece of fabric, but a labor of love.
There’s nothing quite like the joy of seeing your patchwork baby blanket being used and cherished. Whether it’s being wrapped around a newborn for warmth, used as a comfort object by a toddler, or kept as a keepsake for years to come, each use adds to its sentimental value. Your blanket is not just a gift, but a cherished heirloom that carries your love and care with it.
In conclusion, creating a quilted baby blanket is a rewarding experience that combines creativity, skill, and emotion. It’s a journey filled with joy, from the first stitch to the last, and beyond as you see your creation cherished. So, keep sewing, keep creating, and keep spreading the warmth and love with your beautiful patchwork baby blankets.


