
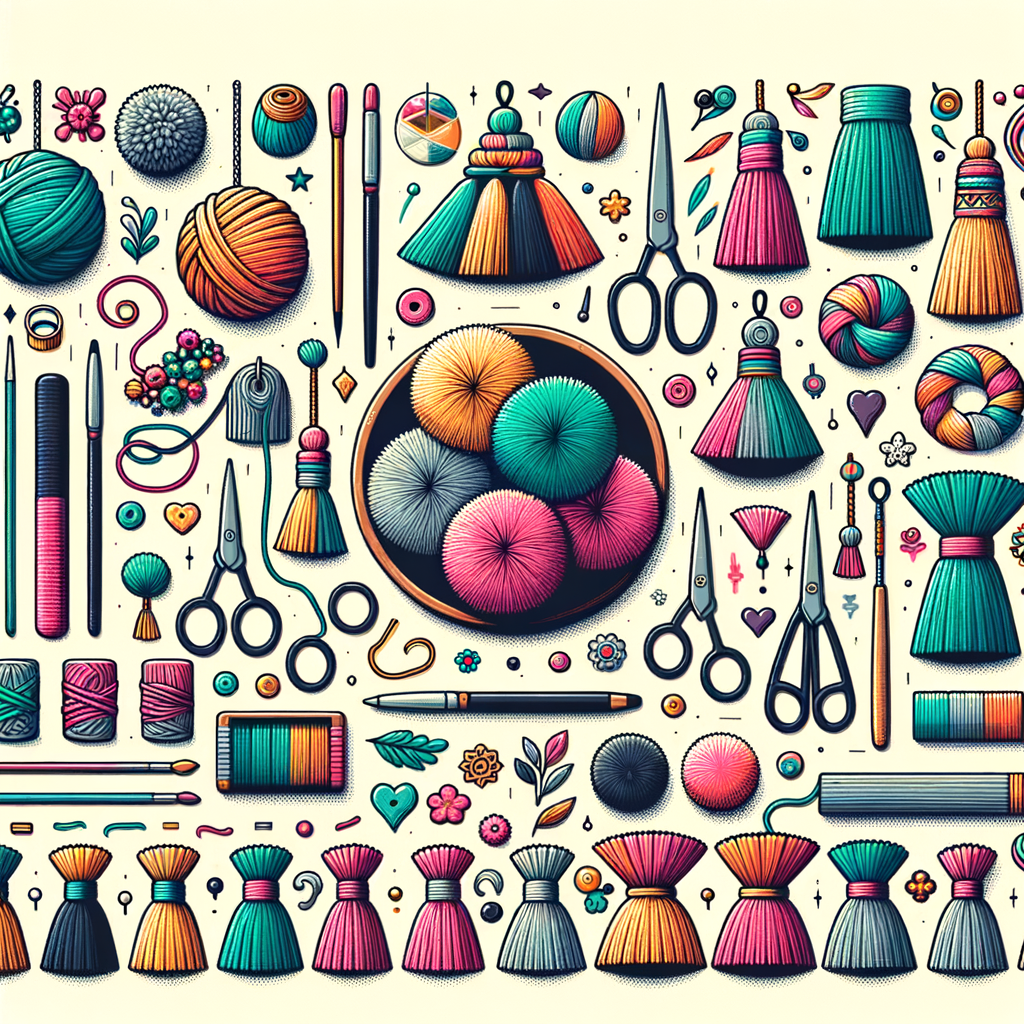
Introduction to DIY Tassels and Pom-Poms
There’s a certain charm and elegance that comes with adding personal touches to your craft projects. One such way is through the use of tassels and pom-poms. These simple yet effective additions can transform your work from ordinary to extraordinary. In this post, we will explore the world of tassels and pom-poms, and how you can make them yourself.
- Overview of tassels and pom-poms in craft projects
- Importance of DIY finishing flourishes
Tassels and pom-poms are versatile elements that can be used in a variety of craft projects. Tassels, traditionally used as decorative finishings on clothing and home decor, are now a popular addition to jewelry, bookmarks, and even handbags. Pom-poms, on the other hand, are fluffy balls made from yarn or fabric that can be used to adorn hats, scarves, and home decor items. They add a fun and playful touch to any project.
DIY finishing flourishes like tassels and pom-poms not only enhance the aesthetic appeal of your projects but also give them a personal touch. They reflect your creativity and individuality. Moreover, making these embellishments yourself can be a rewarding experience. It allows you to customize your projects according to your preferences and adds a sense of accomplishment to your crafting journey.
Whether you’re a seasoned crafter or a beginner, learning to make your own tassels and pom-poms can open up a world of creative possibilities. So, let’s dive in and explore how you can add these delightful finishing touches to your crafts.
DIY Tassels: A Comprehensive Guide
Creating your own tassels can be a fun and rewarding project. With the right materials and a little patience, you can add a personal touch to your home decor, clothing, and accessories. In this guide, we will walk you through the process of making your own tassels.
Tassel Creation Guide: Materials Needed
Before you start making your tassels, it’s important to gather all the necessary materials. Here’s what you’ll need:
- Choosing the right thread or yarn
- Essential tools for tassel making
The type of thread or yarn you choose can greatly affect the look and feel of your tassel. For a softer, more flexible tassel, consider using embroidery thread or thin yarn. For a chunkier, more robust tassel, thicker yarn or even rope can be used. The color of your thread or yarn will also play a big role in the final appearance of your tassel, so choose a color that suits your project.
There are a few tools that will make your tassel making process easier. These include a pair of sharp scissors for cutting your thread or yarn, a piece of cardboard or a tassel maker for wrapping your thread or yarn, and a needle and thread for securing your tassel. You may also find a comb useful for fluffing out your tassel once it’s made.
Now that you have all your materials gathered, you’re ready to start making your tassel. In the next section, we’ll walk you through the step-by-step process of creating your own handmade tassels.
Step-by-Step Process of Making Handmade Tassels
Creating your own tassels can be a fun and rewarding project. Here, we will guide you through the process step by step.
- Preparing your thread or yarn
- Creating the tassel head
- Finishing touches for your tassel
Start by choosing your thread or yarn. The type and thickness of the material you choose will determine the look and feel of your tassel. For a soft, fluffy tassel, choose a thick, soft yarn. For a sleek, elegant tassel, a thin, glossy thread would be perfect. Once you’ve chosen your material, cut a piece of thread or yarn about 12 inches long. This will be the top of your tassel, where it will hang from.
Next, you will create the head of the tassel. To do this, wrap your thread or yarn around a piece of cardboard that is the length you want your tassel to be. The more times you wrap it, the thicker your tassel will be. Once you’ve wrapped it enough, cut the thread or yarn from the ball. Then, slide the wrapped yarn off the cardboard, and tie the 12-inch piece of thread or yarn you cut earlier around the top of the bundle, creating a small loop. This will be the top of your tassel.
Finally, you will add the finishing touches to your tassel. Cut another piece of thread or yarn about 24 inches long. Wrap this piece around the tassel head a few times, about an inch from the top, and tie it tightly. This creates the “neck” of the tassel. Trim the ends of the tassel to make them even, and voila! You have made your own handmade tassel.
With these simple steps, you can create beautiful, handmade tassels to add a personal touch to your home decor, clothing, or jewelry. Happy crafting!
Fun Craft Ideas with DIY Tassels
Once you’ve mastered the art of making tassels, the possibilities for using them in your crafts are endless. Here are some fun and creative ways you can incorporate tassels into your everyday items.
- Decorating Home Accessories with Tassels
- Adding Tassels to Your Clothing and Jewelry
Adding tassels to your home accessories can give them a fresh and stylish look. You can attach them to cushions, curtains, or even lampshades. They can also be used to embellish table runners or placemats. Tassels can add a touch of elegance and sophistication to any room.
For example, a simple white cushion can be transformed into a chic and trendy accessory with the addition of a few colorful tassels. Or, a plain lampshade can become a statement piece with some strategically placed tassels.
Remember, the key to successful decorating is balance. Don’t overdo it with too many tassels. A few well-placed ones can make a big impact.
Tassels aren’t just for home decor. They can also be used to add a fun and fashionable twist to your clothing and jewelry. You can sew them onto the hem of a skirt or dress, attach them to a pair of earrings, or even use them to create a unique and stylish necklace.
For instance, a pair of denim shorts can be given a boho-chic makeover with the addition of some tassels. Or, a simple gold chain can be transformed into a statement necklace with a large, colorful tassel.
When adding tassels to clothing or jewelry, remember to choose colors that complement the rest of the item. And, as with home decor, less is more. A single, well-placed tassel can be more effective than a bunch of them.
In conclusion, tassels are a versatile and creative way to add a touch of style and personality to your items. Whether you’re decorating your home or updating your wardrobe, tassels can make a big difference. So, why not give it a try? You might be surprised at how much fun you can have with a little bit of thread and a lot of creativity.
Making Pom-Poms: A Detailed Tutorial
Creating your own pom-poms is a fun and rewarding craft project. With just a few simple materials, you can create colorful and fluffy pom-poms to use in a variety of ways. Let’s start by discussing the materials you will need.
Pom-Pom Making Tutorial: Materials Needed
Before we dive into the step-by-step process of making pom-poms, it’s important to gather all the necessary materials. Here’s what you’ll need:
- Selecting the right yarn for pom-poms
- Must-have tools for pom-pom creation
Yarn is the main ingredient in pom-pom making. The type of yarn you choose will determine the look and feel of your pom-poms. Acrylic yarn is a popular choice due to its durability and wide range of colors. Wool yarn, on the other hand, creates a softer, more luxurious pom-pom. Experiment with different types and thicknesses of yarn to find what you like best.
There are a few essential tools you’ll need to make pom-poms. These include a pom-pom maker or a piece of cardboard, a pair of sharp scissors, and a needle and thread. A pom-pom maker is a handy tool that makes the process easier, but a piece of cardboard can also do the trick. Sharp scissors are crucial for cutting the yarn and shaping the pom-pom, while a needle and thread are used to secure the pom-pom’s center.
Now that you have your materials ready, you’re all set to start making your own pom-poms. Stay tuned for our step-by-step guide to homemade pom-poms, where we’ll walk you through the entire process from start to finish.
Step-by-Step Guide to Homemade Pom-Poms
Creating your own pom-poms can be a fun and rewarding process. Here’s a simple step-by-step guide to help you make your own fluffy and colorful pom-poms.
- Setting up your yarn
- Forming the pom-pom
- Finishing your pom-pom
Start by choosing your favorite color of yarn. You’ll need about 100 yards for each pom-pom. Unravel the yarn and cut a piece about 12 inches long. This will be used later to tie your pom-pom together.
Next, wrap the yarn around your hand about 100 times. The more times you wrap, the fuller your pom-pom will be. Once you’ve wrapped the yarn enough times, carefully slide it off your hand. Use the 12-inch piece of yarn you cut earlier to tie a knot around the middle of the yarn bundle. Make sure it’s tight!
Now it’s time to create the pom-pom shape. Using a pair of sharp scissors, cut through the loops on both sides of the yarn bundle. Be careful not to cut the piece of yarn that’s tying the bundle together. Once you’ve cut all the loops, fluff up your pom-pom by shaking it gently. You can also trim it to make it more round.
And there you have it! A homemade pom-pom. Remember, practice makes perfect. The more pom-poms you make, the better you’ll get at it. Happy crafting!
Crafty Projects with Homemade Pom-Poms
Now that you’ve mastered the art of making pom-poms, let’s explore some creative ways to use them. Pom-poms can add a fun, whimsical touch to your home decor and wardrobe. Here are two crafty projects you can try with your homemade pom-poms.
- Using Pom-Poms in Home Decor
- Pom-Pom Garland: String your pom-poms together to create a vibrant garland. Hang it across a mantel, window, or wall for a festive touch.
- Pom-Pom Pillow: Sew pom-poms onto the edges of a pillow for a fun and cozy accent piece.
- Pom-Pom Rug: If you’re feeling ambitious, you can even make a whole rug out of pom-poms. It’s a time-consuming project, but the result is a soft, fluffy, and colorful rug that’s sure to be a conversation starter.
- Incorporating Pom-Poms into Your Wardrobe
- Pom-Pom Scarf: Sew pom-poms along the edges of a scarf for a unique and stylish accessory.
- Pom-Pom Hat: Add a large pom-pom to the top of a knit hat for a classic winter look.
- Pom-Pom Jewelry: Use small, tightly wound pom-poms to create colorful earrings or a necklace.
Pom-poms can be a delightful addition to your home decor. They can add color, texture, and a playful touch to any room. Here are a few ideas:
Pom-poms aren’t just for home decor. They can also add a pop of color and fun to your wardrobe. Here are some ways to incorporate pom-poms into your clothing and accessories:
These are just a few ideas to get you started. The possibilities with pom-poms are endless. So, start crafting and let your creativity shine!
Tassel and Pom-Pom Projects: Case Studies
Let’s delve into some real-life examples of how tassels and pom-poms can transform everyday items into unique, personalized pieces. These case studies will provide you with inspiration and practical insights for your own DIY projects.
-
Case Study 1: Transforming a simple bag with tassels and pom-poms
Our first case study involves a simple canvas tote bag. Initially, it was just a plain, unadorned bag. But with the addition of colorful tassels and pom-poms, it became a vibrant, eye-catching accessory.
The tassels were made using a variety of threads to match the bag’s color scheme. They were then attached to the bag’s handles, adding a playful touch. The pom-poms, made from soft, fluffy yarn, were sewn onto the bag’s body, creating a fun, textured look.
The result? A unique, personalized bag that stands out in a crowd. This project demonstrates how tassels and pom-poms can add a touch of personality to even the simplest of items.
-
Case Study 2: Adding flair to a plain sweater with handmade flourishes
Our second case study involves a plain, off-the-rack sweater. The goal was to transform it into a one-of-a-kind piece using handmade tassels and pom-poms.
The tassels, made from soft, colorful yarn, were sewn onto the sweater’s cuffs and hem. This added a pop of color and a touch of whimsy to the otherwise plain sweater. The pom-poms, also made from yarn, were sewn onto the sweater’s front, creating a fun, 3D effect.
The end result was a stylish, unique sweater that truly stands out. This case study shows how with a little creativity and effort, you can transform a plain item into a personalized masterpiece.
These case studies demonstrate the transformative power of tassels and pom-poms. With a little creativity and effort, you can add personality and flair to any item. So why not give it a try? You might be surprised at what you can create.
Key Takeaways: The Joy of DIY Finishing Touches
As we wrap up our exploration of DIY tassels and pom-poms, let’s take a moment to reflect on the key insights we’ve gained. These simple, yet creative additions can bring a whole new level of joy and satisfaction to your crafting experience.
- The satisfaction of creating your own tassels and pom-poms: There’s a unique sense of accomplishment that comes from creating something with your own hands. Crafting your own tassels and pom-poms not only allows you to express your creativity, but it also gives you the opportunity to create something truly unique. As one DIY enthusiast put it, “The joy of making something by hand is that it’s yours. It’s your creation, your design, your effort, and your accomplishment.”
- How DIY flourishes can transform your crafts: Adding DIY tassels and pom-poms to your crafts can truly transform them. These small details can make a big difference, turning a simple item into something extraordinary. For instance, a plain knitted scarf can become a stylish accessory with the addition of handmade tassels. Similarly, a basic cushion can turn into a fun and vibrant piece of home decor with some colorful pom-poms. As we’ve seen in our case studies, these DIY flourishes can add a personal touch and elevate your crafts to a new level.
In conclusion, the joy of DIY finishing touches lies in the satisfaction of creating something unique with your own hands and seeing how these small details can transform your crafts. So, why not give it a try? Grab some yarn, follow our guides, and start adding your own DIY finishing touches to your crafts. Happy crafting!


