Knitting is a timeless and versatile craft that can open the doors to endless creative possibilities.
As a newcomer, it might be intimidating to dive into the vibrant world of knitting patterns, but don’t worry – I’m here to guide you through understanding these patterns and set you on the path to success in your knitting journey.
I remember when I first started, knitting patterns looked like a foreign language. But soon, I realized that, with practice and patience, these cryptic codes turned into beautiful masterpieces in my hands.
Learning how to decipher knitting patterns may have its challenges, but I promise it’s a skill that is worth your time and effort.
In our journey together, I will share my personal experience and help you understand knitting abbreviations, codes, and terms.
We will explore the essential materials and techniques that even the most advanced patterns rely on.
Most importantly, I will provide beginner-friendly tips, projects, and solutions to common mistakes you may encounter along the way.
Key Takeaways
- Familiarize yourself with knitting abbreviations, codes, and terms
- Learn essential techniques, such as casting on and off and navigating rows and rounds
- Practice with beginner-friendly projects to build confidence and skill
Understanding Knitting Patterns
As a beginner knitter, I know that diving into the world of knitting patterns can be a bit overwhelming.
But don’t worry! I’m here to help you understand the basics of knitting patterns, making it easier for you to learn to knit and create beautiful projects.
When I first started learning to knit, I quickly realized that knitting patterns are the essential guidelines that provide us with the instructions needed to complete a project.
They come in two main formats: written instructions and knitting charts.
In written instructions, the knitting pattern describes each step with abbreviations and phrases.
It’s important for me to familiarize myself with these abbreviations, as they represent different knitting techniques.
For example, “K” stands for “knit,” and “P” represents “purl.” As I learn to knit, I may encounter additional abbreviations, but most patterns include a legend or key for reference.
On the other hand, knitting charts are visual representations of the knitting pattern. They display symbols that correspond to specific knitting techniques, similar to written instructions.
Knitting charts are organized in a grid format, with each square representing a stitch.
I find it helpful to remember that I read a knitting chart from right to left and bottom to top, just like I’d knit.
Here are a few tips that I found valuable when understanding knitting patterns:
- Pay attention to the pattern gauge: It refers to the number of stitches and rows per inch or centimeter, which determines the size of my finished project. To achieve the desired gauge, I make sure to use the recommended yarn weight and needle size.
- Follow the pattern closely: I make sure to read the entire pattern before starting and follow each step as indicated. This helps me avoid any mistakes or confusion.
- Use stitch markers: When working on a pattern with multiple repeats or sections, I find stitch markers helpful in tracking my progress and ensuring I’m following the pattern correctly.
- Practice makes perfect: As a beginner knitter, I understand that it’s normal to make mistakes. The more I knit and learn, the easier it becomes to understand and follow knitting patterns.
By closely following these guidelines and tips, I am now able to tackle a variety of knitting patterns with confidence and ease, and I hope this helps you as well as you begin your knitting journey!
Getting Started With Materials
Choosing Your Yarn and Needles
When starting with knitting, the first thing I like to consider is the type of yarn and needles. There are countless options for yarn thicknesses, textures, and colors.
For a beginner, I recommend choosing a medium-weight yarn that is easy to work with, such as a wool yarn. It usually comes in a ball or hank, making it easy to manage.
As for knitting needles, there are various materials to choose from, like wooden needles or metal ones.
For beginners, I prefer using wooden needles because they offer more grip and make it easier to control the yarn.
The size of the knitting needles should correspond to the yarn thickness. Most yarn labels recommend a specific needle size, so be sure to check it before buying.
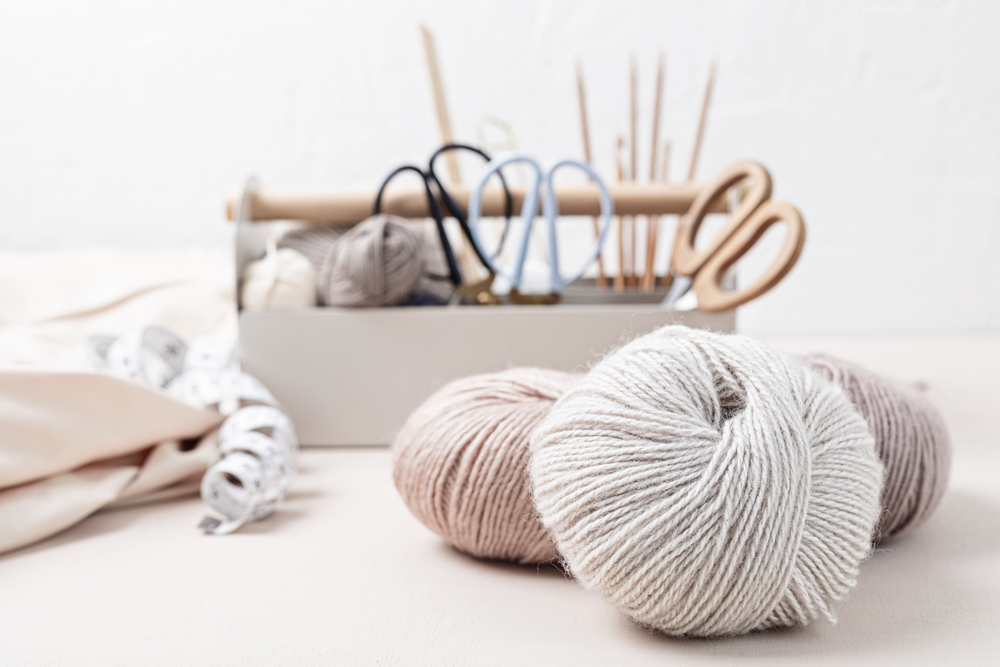
Organizing Your Knitting Kit
As I gather my materials for knitting, I like to keep them organized in a knitting kit, which includes essential tools, such as:
- Yarn: A ball of yarn or hank of the desired color and thickness.
- Knitting Needles: A pair of wooden or metal needles in the recommended size for my yarn.
- Crochet Hook: A small hook for picking up dropped stitches or weaving in ends.
- Yarn Needle: A large, blunt needle for sewing pieces together or weaving in ends.
- Stitch Markers: Small markers to place on the knitting needles to help track my progress.
By having everything organized in one place, I can easily find what I need and make the knitting process more enjoyable and efficient.
Decoding Knitting Abbreviations
As a beginner knitter, I know it can be overwhelming to dive into a new knitting pattern without understanding the lingo used.
That’s why I’ve compiled this list of knitting abbreviations that are commonly found in patterns.
Having a good grasp of these abbreviations will make your knitting experience much more enjoyable.
- CO: This stands for “cast on” and is the first step in any knitting project. It refers to the number of stitches you need to start your project.
- K: This represents “knit,” which is the most basic stitch in knitting. You’ll often see this followed by a number (e.g., K3) which indicates how many knit stitches you need to make.
- P: This abbreviation stands for “purl,” another fundamental stitch in knitting. Similar to the knit abbreviation, a number might follow this to tell you how many purl stitches you need to create (e.g., P2).
- RS: This is short for “right side,” referring to the front or visible side of your knitting project. Patterns often have instructions specifically for the right side.
- WS: This stands for “wrong side,” which is the back or not visible side of your knitting project. Like RS, there might be different instructions for the wrong side.
- K2tog: This means “knit two together.” This is a common method of decreasing stitches by knitting two stitches together as if they were just one.
- SSK: This abbreviation represents “slip, slip, knit,” another decreasing technique. Here, you’ll slip two stitches (one at a time) from the left needle to the right needle, then knit them together through the back loop.
- YO: This stands for “yarn over,” and it’s a technique used to create a decorative hole or increase stitches. To do this, you’ll simply bring the yarn over the needle before making the next stitch.
- M1L (Make one left) and M1R (Make one right): These are methods of increasing stitches by creating a new stitch between existing stitches. M1L leans left, while M1R leans right. To achieve this, you’ll lift the running thread (the yarn between two stitches) and knit into either the front loop (M1L) or the back loop (M1R).
- BO: This stands for “bind off” or “cast off.” It’s the final step of your project and involves securing the remaining stitches to prevent unraveling.
Now that you have a better understanding of these knitting abbreviations, I hope you feel more confident when jumping into your next pattern.
Remember that practice makes perfect, and soon enough, these abbreviations will become second nature to you. Happy knitting!
Understanding Knitting Codes and Terms
When I first started knitting, I found the patterns quite confusing because of all the abbreviations and codes. With time, I learned that these codes and terms are actually quite simple.
In this section, I’ll share my knowledge of knitting codes and terms so you can understand them better.
The first thing you’ll encounter in knitting patterns is the legend. This is a list of abbreviations and their meanings, which will help you decipher the pattern.
Some common abbreviations you may find are:
- k: knit
- p: purl
- yo: yarn over
- sl: slip stitch
- ssk: slip, slip, knit
You may find other abbreviations, but don’t get overwhelmed; they’ll be explained in the legend.
Just refer back to it whenever you come across something unfamiliar.
Next, let’s talk about direction. Knitting patterns often use numbers and row indicators to show you the order of completing each section.
For example, if the pattern says “Row 1: k3, p2”, that means you knit three stitches and then purl two stitches for the entire first row.
Keep following the directions for each row as specified in the pattern.
When reading a knitting pattern, it’s essential to know the names of the different stitches and techniques involved. For instance, you’ll see terms like “stockinette stitch” or “garter stitch”.
By understanding these names, you can perform the proper stitch and create the desired texture in your project.
So there you have it: understanding knitting codes and terms became much more manageable once I familiarized myself with the legend, numbers, and direction.
With some practice, you’ll soon find reading knitting patterns as easy as any other skill
Learning Basic Stitches
Knit and Purl
When I first started knitting, I learned that knit and purl stitches are the foundation for all knitting patterns.
The knit stitch is usually represented by a “K,” and the purl stitch is represented by a “P.”
To make a knit stitch, I insert my right needle into the front of the first stitch on the left needle, wrap the yarn around it, and pull the loop through to create a new stitch.
For the purl stitch, I do the opposite, inserting the right needle into the front of the first stitch on the left needle, wrapping the yarn around, and pulling the loop through to create a new stitch.
By alternating knit and purl stitches, I can create several different knitting patterns.
Moving Beyond the Basics
Once I was comfortable with knit and purl stitches, I began to explore other knitting stitches, like the garter stitch and the stockinette stitch.
The garter stitch is simply a combination of alternating rows of knit and purl stitches. In other words, I knit one row and then purl the next.
This creates a textured, ridged fabric that’s great for scarves and blankets.
On the other hand, the stockinette stitch is created by knitting one row and then purling the next row, always repeating these two rows.
This stitch creates a smooth fabric with a subtle “V” pattern, perfect for garments and accessories.
By mastering these basic stitches, I found that I could create a wide variety of knitting patterns, developing my skills and confidence along the way.
Mastering the Cast On and Off
When I first started learning how to knit, mastering the cast-on and off techniques played a key role in creating a clean, polished piece.
I’ll share with you some of the tips I’ve learned so you can add them to your beginner’s guide to knitting patterns.
To begin, casting is the process of creating the foundation row of stitches on your needle.
There are various methods to cast on, but one of the most commonly used and beginner-friendly techniques is the long-tail cast-on.
Here’s a brief rundown of the steps:
- Make a slipknot: Create a slipknot on the working needle and leave a long tail.
- Hold the yarn: Hold the yarn and needle in your hands in a specific way to create tension.
- Insert the needle: Using the working needle, insert it underneath the yarn on your thumb.
- Pull the yarn: Pull the needle up and over the yarn on your index finger, then down through the loop.
- Create the stitch: Release the loop from your thumb and tighten the stitch.
Now that your foundation row is established, you can start knitting! Eventually, you’ll reach the end of your project and need to cast off (also known as binding off).
This will secure your stitches so that your work doesn’t unravel. There are different techniques for binding off, but the basic bind-off is a great place to start. Follow these steps:
- Knit two stitches: Knit two stitches onto your right needle.
- Pass stitch over: With your left needle, pass the first stitch over the second stitch on your right needle, dropping it off the needle.
- Repeat the process: Knit another stitch onto your right needle, and then pass the previous stitch over the new one and drop it off the needle.
- Finish: Continue this process until you’re left with one stitch on your right needle. Cut the yarn, leaving a tail, and pull it through the last stitch to secure it.
And there you have it! With practice, you’ll become more comfortable and efficient in casting on and off, providing a solid foundation and finish for your knitting projects.
Remember to have patience and enjoy the process, and soon enough, you’ll be creating beautiful knitted masterpieces. Happy knitting!
Navigating Rows and Rounds
When I first started knitting, understanding the difference between rows and rounds seemed a bit confusing.
But, trust me, with a little practice, it becomes second nature. Let me share with you some basics that will help you navigate through rows and rounds.
As beginners, we must start by distinguishing between rows and rounds. Rows refer to when you knit back and forth, creating a flat piece of fabric.
Rounds, on the other hand, are when you knit in a circular manner, without any gaps, to create a seamless tubular fabric.
Now, let’s talk about the right side and wrong side of your knitting. The right side is the side that shows your desired pattern, while the wrong side displays the reverse of it.
When you follow a pattern, it usually specifies which is the right side and which is the wrong side.
Typically, when knitting rows, you’ll work on the right side in one pass and on the wrong side in the subsequent pass.
This means that odd-numbered rows are right-side rows, while even-numbered rows are wrong-side rows.
In contrast, when knitting rounds, all the stitches are on the right side, creating a smooth, continuous pattern.
A few key points to remember while navigating rows and rounds:
- Always pay attention to the pattern and its instructions. They will guide you through right-side and wrong-side rows.
- When knitting in rounds, use a stitch marker to mark the beginning of a round. This will help you keep track of your progress.
- If you happen to lose track of your rows, don’t panic! Simply count the rows from the cast-on edge to figure out where you are.
I hope these tips will make your journey into knitting more enjoyable.
Remember that practice makes perfect, and as you continue to knit, navigating rows and rounds will be second nature to you.
Different Knitting Techniques
I have always been fascinated with knitting, and learning different knitting techniques has been a joy for me.
To help my fellow knitting enthusiasts, I’d like to share some of these techniques that I’ve encountered over the years.
First and foremost, let me introduce you to the English method of knitting, also known as “throwing.”
In this method, I hold the yarn in my right hand and “throw” it around the needle to create stitches.
This technique is widely used across the globe and is known for its rhythmic and relaxing motion.
Another essential knitting technique to master is learning how to knit in the round. Knitting in the round allows me to create seamless tubes of fabric, which is perfect for projects like hats, sweaters, and socks.
To do this, I use circular needles or double-pointed needles (DPNs), depending on the circumference of my project.
Trust me, once you get the hang of it, you’ll never want to go back to sewing seams!
In addition to the English method, there is the Continental method of knitting, also known as “picking”.
In this technique, I hold the yarn in my left hand and use the needle to “pick” up the yarn, creating new stitches.
Some knitters find this method faster and more efficient, especially when working with intricate stitch patterns.
Now, let’s talk about some common techniques within these methods:
- Knit stitch: This is the most basic stitch, forming the foundation of all knitting patterns. It involves inserting the right needle into the loop on the left needle, catching the yarn, and pulling it through, creating a new stitch on the right needle.
- Purl stitch: This is the reverse of the knit stitch, giving the other side of the fabric a different texture. I insert the right needle into the loop on the left needle from the opposite direction, then wrap the yarn around the needle and pull it through.
- Increases: To shape my knitting projects, I often need to increase the number of stitches. Methods for this include the “make one” (M1) technique, “knitting front and back” (KFB), and various “yarn over” (YO) techniques.
- Decreases: Just like I have to increase stitches, sometimes I also need to decrease them to achieve the desired shape. Common decreasing techniques are “knit two together” (K2tog), “purl two together” (P2tog), and “slip, slip, knit” (SSK).
Mastering different knitting techniques opens up a world of creative possibilities.
Remember, practice makes perfect! Enjoy your knitting journey, and don’t be afraid to try new things.
Common Knitting Mistakes and Solutions
As a beginner, I know that knitting can be both exciting and frustrating, especially when it comes to making mistakes.
I have encountered some common knitting mistakes and found solutions to help beginners avoid or correct them.
One of the easiest mistakes to make is a dropped stitch. This happens when a stitch accidentally slips off the needle while knitting.
To fix a dropped stitch, use a crochet hook to catch the dropped stitch and pull it back up through the loop until you have it back on the needle.
Another common mistake beginners make is twisted stitches. This occurs when the stitch isn’t properly situated on the needle and ends up twisted when knitting it.
To avoid twisted stitches, always ensure your stitches are not twisted when you’re sliding them from the left needle to the right needle.
Mistakenly adding or missing stitches can also be an issue for beginners. This often leads to uneven edges or a change in the size of your work.
To fix this mistake, you can use a stitch marker or row counter to keep track of your stitches and rows.
Incorrect tension is another common mistake that can lead to different knitting results. If you knit too tightly or too loosely, your final project may not have the desired size or appearance.
To solve this issue, practice knitting with consistent tension and consider using a knitting tension regulator if necessary.
When it comes to knitting mistakes, remember that I’m not alone as a beginner, and errors are a part of the learning process.
As I keep practicing and applying these solutions, my skills will improve, and the number of mistakes I make will decrease.
So, let’s not be discouraged and keep practicing our knitting together!
Advanced Knitting Patterns
As my skills in knitting continue to grow, I find that tackling advanced knitting patterns is both challenging and rewarding.
While I might have started with simple patterns at the beginner level, moving on to intermediate and advanced projects allows me to create intricate designs and more complex fabric textures.
In advanced knitting patterns, the skill level required might be higher due to the integration of more stitch variations, increases, and decreases.
For instance, I had to learn how to execute the slip knot, gauge, and different types of decreases to follow these patterns effectively.
Another aspect I need to pay attention to when working with advanced patterns is the measurement and sizing.
To ensure the final product fits well and stays true to the desired scale, I commit to being precise with my measurements.
Doing so also includes being mindful of my gauge – I make sure it’s consistent throughout the project to avoid any discrepancies in the final result.
To make following advanced patterns easier, I like to:
- Keep track of row counts and stitch types using tables or charts
- Create a list of abbreviations specific to the pattern
- Use bullet points to organize the pattern’s steps
- Employ bold text for crucial information or tips
By using these formatting tools, I can navigate through the pattern more efficiently, quickly refer to essential details, and ensure a smoother knitting experience.
Embracing advanced knitting patterns has undoubtedly expanded my knitting repertoire, allowing me to challenge myself and create beautiful, intricate pieces.
If you’re also looking to elevate your knitting skills, don’t be afraid to try out advanced patterns – you might be surprised by what you can achieve with persistence and practice!
Knitting Projects for Beginners
As a beginner, I find that starting with simple knitting projects helps me build confidence and improve my skills.
Here are a few projects that I’ve found perfect for those new to knitting.
Scarves: Scarves are one of the most popular beginner projects because they require just a basic knowledge of knitting stitches. They also allow you to practice knitting techniques and patterns without much complication. Plus, they keep you warm and stylish!
Hats: Hats are another great option for beginners. They typically use circular or double-pointed needles, which may be a bit challenging at first, but definitely worth the effort. Knitting a hat will teach you valuable skills like decreasing and shaping.
Blankets: Blankets can be as simple or intricate as you’d like. As a beginner, I recommend starting with a basic garter stitch or stockinette stitch pattern. You can even use different colors to create a striped effect. Blankets may take longer to complete, but they are incredibly rewarding!
- Mittens: If you’re looking to branch out from flat projects, try mittens. They require knitting in the round, similar to hats, and help you learn how to shape thumb gussets and pick up stitches.
- Jumper: For those wanting to jump straight into garment knitting, a jumper (or sweater) might be an exciting challenge. Start with a basic top-down raglan jumper using simple stitch patterns to keep it manageable.
Don’t be afraid to get creative with your knitting projects. Mix and match stitch patterns, colors, and textures to make your knitting journey a fun and exciting one.
Remember, practice makes perfect, so keep knitting and growing your skills. Good luck, and happy knitting!
Frequently Asked Questions
How can I decipher knitting pattern terminology?
I’m always confused by pattern terminology initially, too. But after a while, it gets easier to understand. A knitting pattern typically includes abbreviations like “k” (knit) and “p” (purl).
Refer to the pattern’s glossary or look up a knitting abbreviation chart online to help you decode the terminology.
What’s the proper way to read knitting pattern brackets and parentheses?
Brackets and parentheses are used to indicate repeated stitch sequences in a knitting pattern. If you see instructions within brackets or parentheses, you’ll need to repeat the instructions within them for the specified number of times.
For example, ‘(k1, p1) twice’ means to knit one, purl one, and then repeat the sequence once more.
How do I read knitting pattern charts in the round?
When it comes to reading knitting pattern charts in the round, remember to always read the chart from right to left. Each row in the chart corresponds to one round of knitting.
Since you’re working in a continuous spiral when knitting in the round, you’ll start each new round in the same direction – from right to left.
What is the meaning of an asterisk in knitting patterns?
An asterisk in knitting patterns usually denotes a point from where you need to repeat instructions.
When you see an asterisk, follow the instructions that follow it, then go back to the asterisk and repeat, continuing until you’ve completed the required repetitions.
What are the essential steps for beginner knitters?
As a beginner knitter, I found these steps helpful:
- Choose a simple pattern and familiarize yourself with its terminology, abbreviations, and symbols.
- Gather your knitting supplies (needles, yarn, scissors, etc.).
- Learn and practice basic knitting stitches (knit and purl).
- Follow the pattern, step by step, and don’t be afraid to ask for help or look up tutorials online.
How to understand knitting pattern repeats?
Understanding pattern repeats involves recognizing a sequence of stitches that are to be worked multiple times within a row or round.
The pattern may specify the number of times you need to repeat the sequence or ask you to repeat until a particular length or stitch count is reached.
Keep an eye out for brackets, parentheses, or asterisks within the pattern, as they often indicate the stitch sequence to be repeated.


